Showing posts with label Car Care. Show all posts

Wednesday, 13 July 2016

Headlight Restoration using Samurai 2K Clearcoat Spray

Last weekend, I had an opportunity to restore a family friend's BMW 525i headlights. It was in a terrible condition due to old age of the car and most probably had been exposed in the sun for too long.
The condition of the headlights before restoration
It had tiny cracks on it, and it was quite yellowish. The light output wasn't that bright as the casing is very blurry. The owner contacted me, booked a time slot for the service, and the car was done in 3 hours, as the headlamp was in a really bad shape.

If you are thinking of attempting this project on your own, you will need;
1. 500 grit, 800 grit, 1000 grit, 1500 grit sandpaper
2. A spray bottle filled with soapy water
3. A bucket filled with water
4. Samurai 2K-in-a-can Clearcoat
5. Newspapers and painters' tape
6. A clean microfibre towel
7. Lots and lots of time.

If the condition of the headlights is not that bad, you can skip the 500 grit sandpaper entirely. But then, if 800 grit sandpaper could not sand down the case, you will need it.

First off, the headlights were taped around it with painters' tape as when you wetsand it, there are chances that you will accidentally sand the paint with it when sanding the edges of the headlights. To protect the paint, it is essential to cover the paint around it. Before sanding, soak all of the sandpapers in water for at least 10 minutes before sanding.

Start off  by wetting the headlamp and the sandpaper with soapy water. Then, start sanding with 500 grit sandpaper in one direction. The trick is to sand either horizontally or vertically and change the direction when you change the grit of the sandpaper. For example, if you're sanding 500 grit horizontally, sand 800 grit vertically. This is to ensure that the whole surface is covered and there are less high and low spots. When sanding, make sure that the surface is always wet. When the cracks appear to be less, move on with 800 grit until the surface is flat to touch. Then, move on with 1000 grit sandpaper, and end with 1500 grit sandpaper.

After sanding.
For this particular project, I used the Samurai 2K Clearcoat which I had mentioned previously in the post where I sprayed my car bumper. The instructions are affixed at the can, where the 2 parts are mixed. When it is opened and mixed, make sure to use it within 4 hours.

Samurai's 2K in a Can
I learned this from a paint shop in Kuching, and when you use this clear coat, the coat can last for 3-5 years, depending on the weather and how the car is maintained. I forgot to take the photo as the winds were blowing strongly at the time and I was rushing for the car to be completed.

Before using the product, make sure that the surface is clean and dry. Cover EVERYTHING that may be in contact with the mist coming from the 2K clearcoat. I learned this lesson the hard way as the clearcoat mist came in contact with my Viva and it left a very rough surface on the car.

Spray the headlamp with multiple coats, and make sure that there are flash times between coats, meaning that before spraying another coat, the underlying coat is dry enough. When it is not dry enough, cracks can form on the clearcoat and it will look horrible. When you are done, let it dry properly.

After clearcoating.

When it is dry enough, it leaves a hard & glasslike coating which will last quite some time.

At a different angle
Close-up
If you are in Sibu, and is interested to do a headlight restoration on your car, just drop a comment below and I will reply to you soonest.

For the DIYers, happy DIYing!

Thursday, 13 August 2015

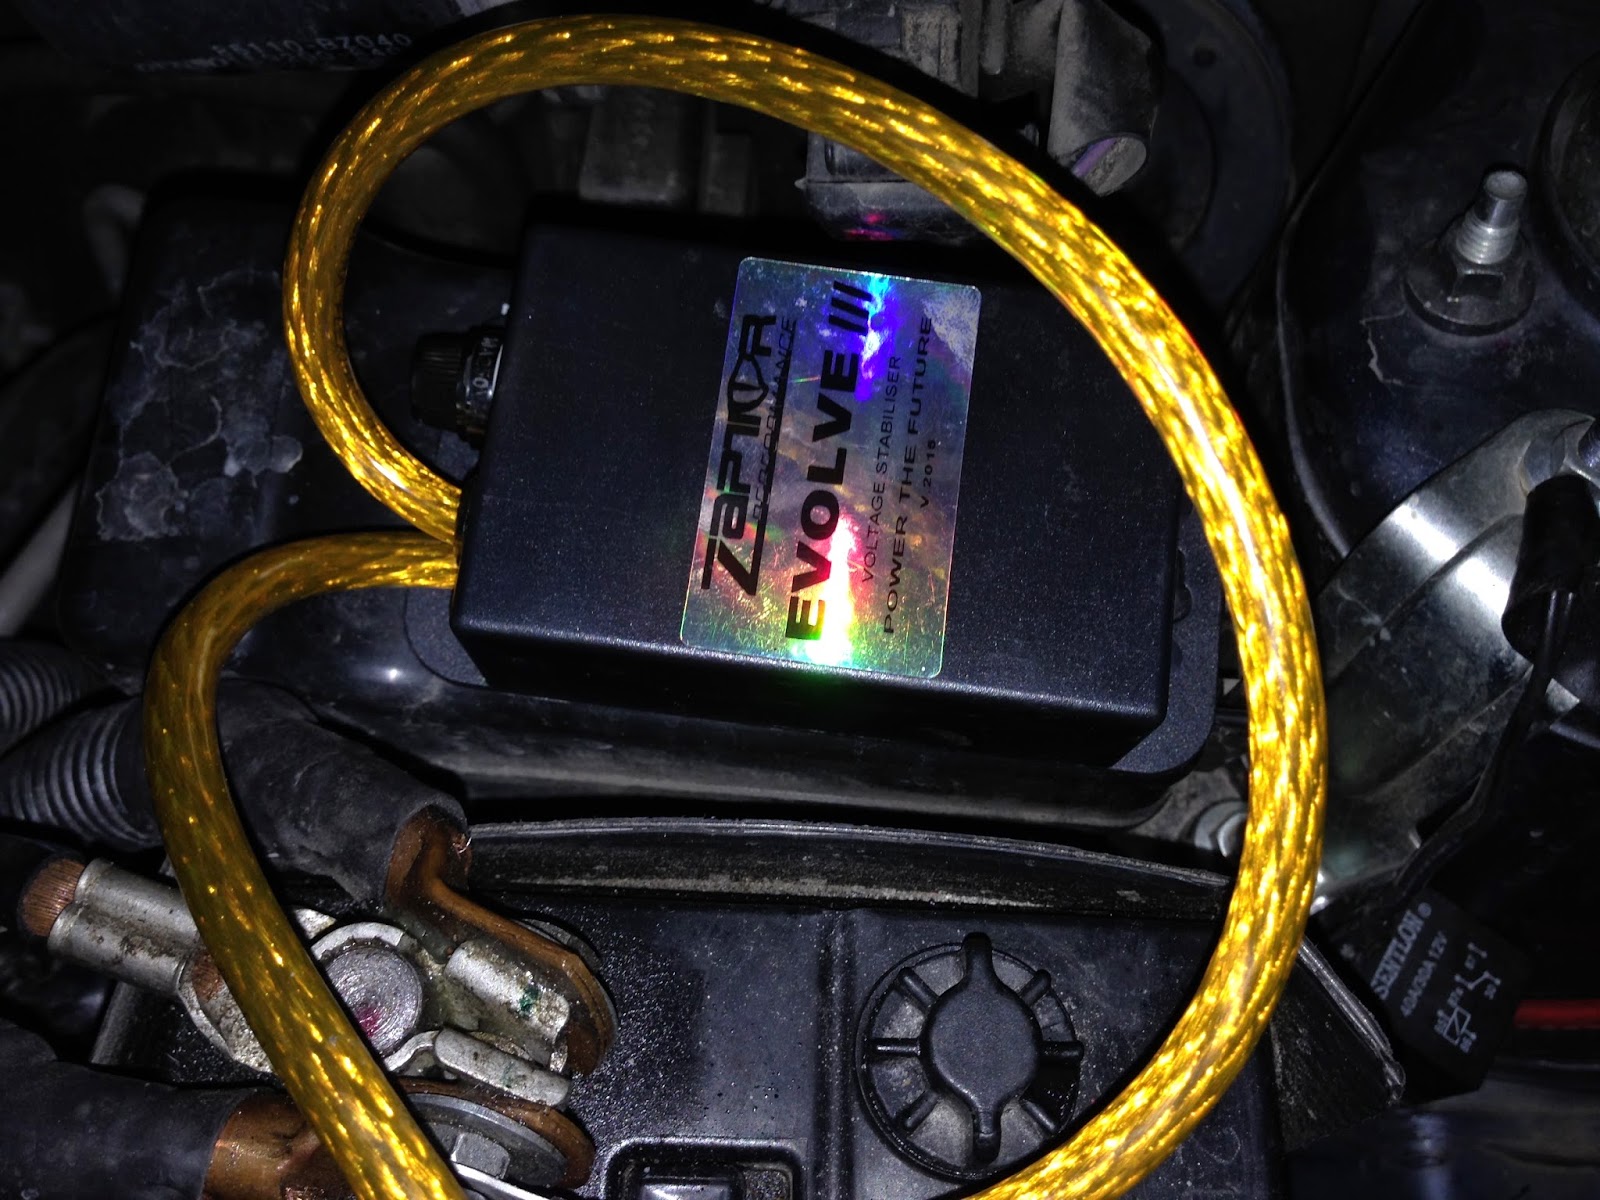
Zaptor Evolve II Voltage Stabilizer

Few months ago, I decided to install a voltage stabilizer in my Viva after I added a set of subwoofer at the back of my car. Since I'm always playing my subwoofer on full blast, my fuel consumption got higher. Why? For every bit of power consumed from the battery, the alternator has to charge the battery, and when the alternator is working, fuel is consumed. To lessen the effect, a voltage stabilizer is needed to regulate the surge of power and to provide extra power when needed.

Zaptor Evolve II
I got this Zaptor Evolve from a friend of mine, and it was RM100. The benefits of using this voltage stabilizer as I copied from a seller at Lowyat, he states that;
BENEFITS OF USING VS:
1. LIGHTER PEDAL FEEL
2. SMOOTHER ACCELERATION
3. COOLER AIR COND
4. BRIGHTER LIGHTS ( CABIN & HEADLAMPS )
5. LESSEN THE KICK BACK-FEEL WHEN THE AIR-COND KICKS IN
6. MIGHT IMPROVE FUEL CONSUMPTION
7.QUICKER ENGINE START

After a few months using this voltage stabilizer, it does make my Viva more responsive and I can easily overtake a few cars with the added VS and grounding cables.

P.S: Sorry for such a long setback on the update because I was quite preoccupied with so many things and my addiction for DoTA is getting worse.

Happy reading!

Friday, 1 May 2015

Liqui Moly Diesel Purge : How-to & Review

Hello everyone! It's been so long since my last post, I had my hands full with assignments and activities in campus that trying to post an article in this blog seems to be a chore for me that I couldn't afford to spend time with. But, today is Labour Day, and to all workers, happy holidays, and do enjoy this moment to catch up with things that was left all this while, like me, this blog.

So, for this post, I'm going to talk about Liqui Moly Diesel Purge. It was used on my dad's 2005 Nissan Frontier, and although it went through 10 years of on-time service and two major services, it was a reliable workhorse. But then, I had a little annoyance with the car ; it seems to lose its power if compared to the early years of the car. 120km/h (it's over the speed limit for all roads in Malaysia and the lovely Pan Borneo Highway) seems to be a burden for the car to achieve that speed. The car feels underpowered, and heavy.

When I went to Liqui Moly's annual dinner at the beginning of the year, I had a chat with Mr. Darien, if my memory serves me right, he was from Kota Kinabalu and explained how diesel engines seems to lose power after a few years, especially in Malaysia. The problem is, Malaysia is still selling Euro 2 diesel with 1500 parts per million of contaminants, although the latest diesel grade is Euro 5/6 with only 15 parts per million of contaminants. As a result, fuel sold in Malaysia is plain dirty, and it clogs the fuel line of most diesel cars. In order to clean the fuel line without much dismantling and get instant results, Liqui Moly Diesel Purge was recommended to me. For only RM45 (pre-GST), it was worth a try.

Liqui Moly Diesel Purge
There are 2 ways to use this Diesel Purge, either you pour it straight into the fuel tank and let it mix with the diesel in the tank as a preventive measure, or use it directly at the fuel pump for cure of the engine's ailments. I chose the second step as the car may have clogged fuel line which results in increased fuel consumption, increased diesel smoke and smell, and also loss of power. 

What you need ; 
1, A small canister, perhaps a 1.5l bottle, the top being cut off.
2. A hose, to extend the lines.
3. Pliers to open the holding rings.
4. Brute force.
5. Patience.

The fuel filter with priming pump
Firstly, locate the fuel filter. For the Nissan Frontier D22, the fuel filter is on the left side of the car, and it has a black priming pump to remove any air trapped in the fuel line, which will come in handy. 

IN and OUT fuel line
Then, locate the fuel line that connects to the fuel filter. Usually, it will be labelled as IN and OUT, but different car manufacturers may probably have different labels.

IN fuel line
Using pliers, loosen the O-ring and pull the fuel line off the fuel filter. Make sure you are ready with the bottle as there are still diesel in the fuel line. The IN fuel line is usually soft and the OUT fuel line is hard as high pressure fuel comes out of the OUT fuel line.
A messy job pulling the fuel line off the fuel pump.
The fuel line is put inside the bottle
Both lines are disconnected from the fuel pump.
As the fuel lines are not in the same length, a hose is needed to extend the fuel line so that both is almost of the same length. I cut about a foot of my garden hose and connect it to the shorter fuel line. Then, make sure that the end of each fuel line is at the bottom of the bottle, and open the can of Diesel Purge, and pour it into the bottle.

Trying to make sure that both hoses are at the bottom of the bottle, submerged.
Once you've done that, ask someone to start the engine and rev the engine at different speeds. When the Liqui Moly Diesel Purge is sucked dry, the engine will stall as there is no more fuel.
All of the Liqui Moly Diesel Purge sucked dry by the engine.
Once it has been sucked dry, disconnect the extension hose and reconnect everything back to its original place in reverse order in how to disconnect it. Once everything is reconnected, try to start the engine. The engine will not start as there is no fuel in the fuel line, and there is still too much air inside. To solve this, pump the accelerator a few times while pressing the fuel priming pump until there is a pressure build up. Then start the engine again. The engine will still die after a second or two because there is still air and no fuel pressure. Repeat the same process again until the engine runs smoothly. For my case, I had to do the process for 5-6 times until I get a smooth and stable idling.

After all has been done, I took the car for a test run. There seems to be less smoke emitted from the exhaust, and the idling is smooth. The fuel consumption seems to be less, and when I took it for a drive, the engine accelerates effortlessly to 140km/h. For RM45, it is really worth it.

Thursday, 12 February 2015

Rolf Semi-Synthetic Engine Oil

Rolf Semi Synthetic is somehow a brand new engine oil in the market. It is made in France and it has a Molybdenium additive in it.
Rolf Semi-Synthetic Engine Oil
I sent my mum's Proton Persona for service at Proride Motorsports at Jalan Kulas, same stretch as Bank Islam Satok branch. At first, I was hesitant to use this particular oil as the brand is foreign to me and this was the first time I actually saw this brand for sale. I wanted to use Proride 10W-40 at first, but after being persuaded by the kind owner, Jackson Bong, I gave it a try.

Up the jack we go!
He explained that this particular oil was better in a sense that it is a semi-synthetic oil with characteristics of a fully synthetic oil. The one I used before was a Castrol GTX 15W-40, and it was recommended by the previous workshop which I would avoid right now due to my previous experience. The workshop foreman was very unfriendly, rude, and the quality of service was extremely poor. I was entitled for a wheel balancing and alignment for my 5th service, but after the so-called "free service", the steering just got worse.

I came to Proride Motorsports a few times for service and I also changed my Viva's original springs to Proride Sport Springs at the workshop.

Oil filter and the old oil in the engine. 
The engine was suffering from poor performance and increased fuel consumption. Somehow, 15W-40 was too thick for my engine and as time goes by, the oil gets thick and it burdens the engine. The Persona's engine heats very quickly and is quite noisy. Acceleration is very poor, and it would take some time to overtake anyone at the highway.

New oil poured into the engine.
Rolf engine oil is 5W-30 and it is green in colour as a result from the additive. After using it for a few weeks, I notice a difference in the performance and fuel consumption of the engine. The engine is more responsive and the fuel consumption is lower than it was before.

The oil is sold for RM150 per litre and the total cost of service was RM160 including oil filter, and the labour is free of charge. So far, I have no complains regarding this oil, and I'm looking forward to use this oil again in the next service.

If you are in Kuching, I would recommend you to give Proride Motorsport @ Jalan Kulas a try. It has a very clean workshop and there is a waiting area for customers where there are sofas, a TV and the waiting area is air-conditioned. What I like most about this workshop is that it is very bright and the owner and staffs are very friendly. The workshop is opened from 10.00a.m. until 9.00p.m.and they do sell Bendix brake pads and Ultra Racing bars to name a few.